Detachment 2702 an internet survival guide
Setting up an ad-blocking VPN with Wireguard and Pihole

This guide will walk you through the setup of a remote machine that will act as a personal VPN server at the cost of 3 to 5 USD per month. We will also configure it to act as a DNS resolver that will automatically block spam, tracking, advertising and malware domains on all of your connected devices.
I will be using Ubuntu 18.04 on a $5 DigitalOcean (affiliate) droplet but there are cheaper alternatives out there.
Rationale
Your internet traffic is accessible to your internet provider which in many cases might not be as innocent as you would imagine. There are many reports where ISPs are actively intercepting network traffic and injecting arbitrary code into the webpage. Thankfully that can be mitigated by always visiting sites through https but not all sites support TLS.
Even with https, ISPs are still able to monitor all the websites you visit and even actively block you from visiting them. Depending on your jurisdiction, it might be perfectly legal for them to sell that data to adtech companies. Even when your ISP is benevolent, your government might not be, as evident by the soon to be implemented UK Porn Ban.
Commercial vs self-hosting
A VPN can solve most of these problems by encrypting and routing your whole internet traffic through a server. Typically those servers are run by companies that provide access to them as a service. However the trust is merely being shifted from your ISP to your VPN provider who is now able to do all the monitoring. That might not seem perfect but it is a pretty big privacy gain since most paid VPN providers focus on privacy as their main selling point. Why bother with self hosting then? Here are some pros and cons.
Pros
- You control the hardware. As a result you can set up ad blocking, add as many devices as you like, give access to your friends etc.
- Certain services like Netflix/Amazon Prime Video etc. blacklist all commercial VPN providers and it’s trivial to detect that you are using one.
- If you are already paying to host something on a VPS it’s essentially free.
Cons
- Your cloud provider (AWS, DigitalOcean) still knows who you are and can monitor your traffic. You can mitigate that by using a provider that accepts anonymous cryptocurrency payments.
- Since you are the only one using it, websites can use your IP as an identifier.
Another approach that combines the best of both worlds is to have your server do the DNS resolution and then route the traffic through a commercial VPN. That requires a more complex setup and it will not be covered here.
Wireguard
Wireguard is a new generation VPN protocol. It’s main selling point is that it is built on modern but tested cryptography, the implementation is very short and it’s fast. And I mean crazy fast, I’ve been using it on all my devices for a few months now and it is very impressing. Have you ever used a VPN on your phone? With OpenVPN it takes 5-10 seconds to connect when your phone wakes up and it drains battery like crazy. Wireguard is based on UDP so there is no connection to be made, it just sprays encrypted packets. There is no key exchange (it happens out of band) and as a result it’s always ready to go with no delay and it feels like it doesn’t drain any battery at all.
Wireguard is an open source project developed mainly by Jason A. Donefeld. It is expected to be merged into the Linux kernel soon and even Linus praised it and that means something. There are currently implementations for Linux (as a kernel module), Android, MacOS, iOS and a Windows version is expected to be released soon.
Pihole
Pihole is a lightweight DNS server typically meant to run on a raspberry pi and acts as a network wide ad blocker for all your devices. It comes with sensible default lists that block around 100.000 malware, advertising and tracking domains but it is highly configurable and you can add as many of the available block lists circulating on the internet as you like. I have added a bunch of lists that block Microsoft telemetry and obnoxious “news” sites but every couple of weeks I find myself having to whitelist a legit blocked domain which is not a big deal because Pihole comes with a slick built-in web interface for this type of tasks.
Setup
Log in to your droplet and update the installed packages.
sudo apt-get update
sudo apt-get upgrade
Pihole
The quickest method to install Pihole is to curl into bash the install script (yes, yes I know)
curl -sSL https://install.pi-hole.net | bash
Alternatively you can clone the repo or download and inspect the script first. More info here
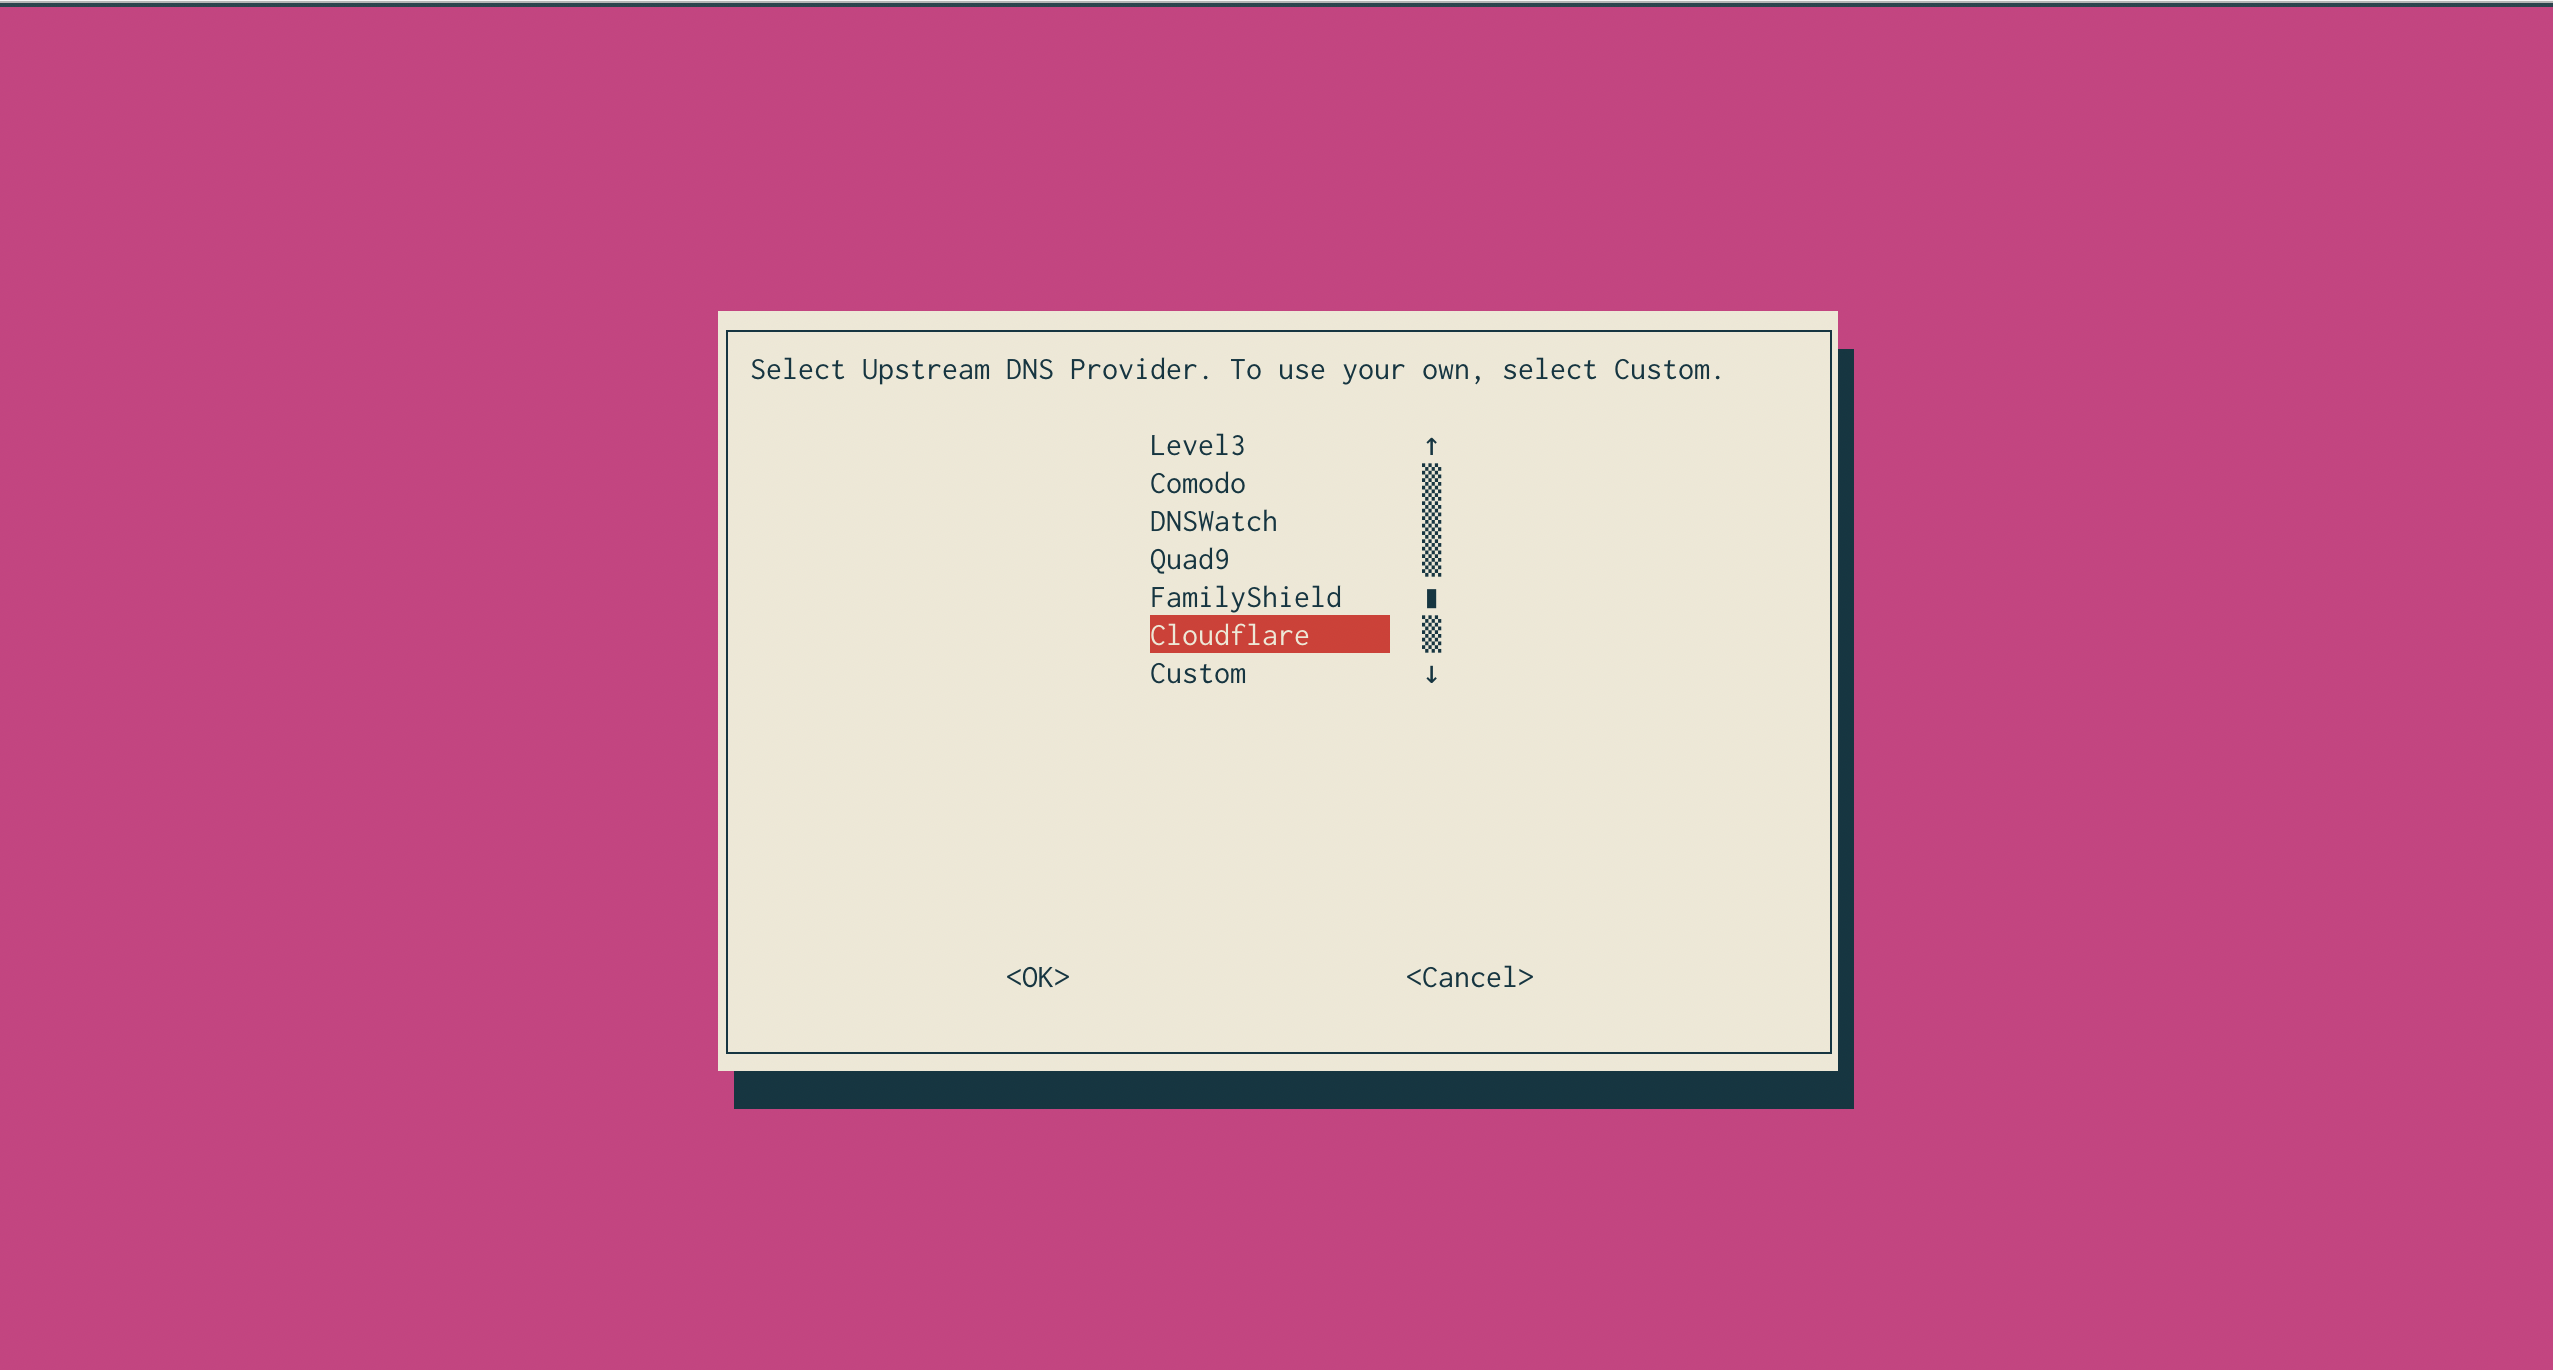
Running through the installer is pretty straight forward and you can’t go wrong with the defaults. One change I like to make is pick Cloudflare’s 1.1.1.1 instead of Google’s 8.8.8.8 for the upstream DNS resolver. Cloudflare launched it’s DNS last year and it is supposed to be more privacy focused. I certainly trust them more than Google with my queries.
Make sure to enable the admin dashboard and write down your password.
This should get you up and running. You can check that pihole is running with
pihole status
and that the web interface is running with
curl -I localhost
If you want to blacklist more domains you can do so manually through the web interface or you can find plenty of curated lists online. To add an online list you have to edit /etc/pihole/adlists.list, add the url in a new line and then type
pihole -g
to update.
Wireguard
Add the wireguard repository ppa.
sudo add-apt-repository ppa:wireguard/wireguard
Install Wireguard and it’s dependencies.
sudo apt install wireguard
If you are actually using a raspberry pi, this won’t work, but you can find installation instructions here
In Wireguard peers are identified by their public keys which are used to encrypt the data. There is no key exchange in the protocol, keys have to be distributed off-channel like in SSH. First we need to generate a private/public key pair for our server.
mkdir /tmp/keys
cd /tmp/keys
wg genkey | tee privatekey | wg pubkey > publickey
You should now have two base64 keys
ubuntu@digitalocean:/tmp/keys$ cat privatekey
eNgugEfWgEh0Py3qOvqi41BmTPwzi5RQOzF2A4LvjnY=
ubuntu@digitalocean:/tmp/keys$ cat publickey
zaAf9ktzmeapk/jAAxZX42elhQZWn8DibDoeW98pTz8=
We will name our new network interface wg0. Create a configuration file for your server in /etc/wireguard/wg0.conf
[Interface]
Address = 192.168.5.1/24
PostUp = iptables -A FORWARD -i %i -j ACCEPT; iptables -A FORWARD -o %i -j ACCEPT; iptables -t nat -A POSTROUTING -o eth0 -j MASQUERADE
PostDown = iptables -D FORWARD -i %i -j ACCEPT; iptables -D FORWARD -o %i -j ACCEPT; iptables -t nat -D POSTROUTING -o eth0 -j MASQUERADE
ListenPort = 51820
PrivateKey = eNgugEfWgEh0Py3qOvqi41BmTPwzi5RQOzF2A4LvjnY=
So, what’s going on here? Let’s see what each line does.
Address: This address will be assigned to the server in the newly created VPN. You should pick a subnet that is used in neither the server nor the client, I picked 192.168.5.xx denoted by the /24 netmask.
PostUp and PostDown: These are commands that will be run when you bring the new wg0 interface up/down. This specific command sets iptables rules to forward all client internet traffic through the internet facing interface eth0 (change that if yours is different). If you only want to create a tunnel but not forward all your traffic through the server you can skip those.
ListenPort: The UDP port that the server will be listening on.
PrivateKey: The server’s private key that we created a moment ago.
Make sure that no one can read the file since it contains a private key (or Wireguard will complain)
sudo chmod 600 /etc/wireguard/wg0.conf
Now generate a pair of keys for the client (your home computer)
ubuntu@digitalocean:/tmp/keys$ wg genkey | tee clientprv | wg pubkey > clientpub
ubuntu@digitalocean:/tmp/keys$ cat clientprv
cJ20xmVjK+9GWk9u3XIRXabfBzJqnVUmdx6H/Qgg12M=
ubuntu@digitalocean:/tmp/keys$ cat clientpub
C7OkTUE5jPaGa6OPYVKr2UgOZ4zNzmswCX2TgU+Irlg=
Let’s create a configuration file for the client.
[Interface]
Address = 192.168.5.2/32
PrivateKey = cJ20xmVjK+9GWk9u3XIRXabfBzJqnVUmdx6H/Qgg12M=
ListenPort = 51820
DNS = <server ip>

[Peer]
PublicKey = zaAf9ktzmeapk/jAAxZX42elhQZWn8DibDoeW98pTz8=
AllowedIPs = 0.0.0.0/0, ::/0
Endpoint = <server ip>:51820
Address: This is the client’s address in the network. I assigned 192.168.5.1 to the server and I am using 192.168.5.2 for the client.
PrivateKey: Since this is the configuration file that we will use on the client, this is the client’s private key.
DNS: We want to use our droplet for DNS so here goes the server’s public IP (the one you SSH into)
In the Peer section we add the server’s details
PublicKey: The server’s public key
AllowedIPs: This entry acts in two ways. It will accept packets through the tunnel if they have this source IP. It will also send packets through the tunnel if they have this destination IP. Since we use the wildcard IPv4 and IPv6 addresses all traffic will go through the tunnel and all traffic will be accepted.
Endpoint: This is the external IP address where the server is reachable (the one you SSH into)
Now that we told the client how to communicate with the server let’s go back to the server’s config in /etc/wireguard/wg0.conf and add a Peer section to authorize the client.
[Peer]
PublicKey = C7OkTUE5jPaGa6OPYVKr2UgOZ4zNzmswCX2TgU+Irlg=
AllowedIPs = 192.168.5.2/32
PublicKey: The client’s public key
AllowedIPs: Same as before, the server will only accept packets with this source IP from this peer and will encrypt and send packets with this destination IP to this peer.
You can repeat this process to create as many configuration files for your devices/friends as you like. For each one of them you need a new Peer section in your server’s config.
Make sure that IP forwarding is enabled.
sudo sysctl net.ipv4.ip_forward=1
Now to bring wg0 up simply type
wg-quick up wg0
Copy the client’s configuration file to your home computer, import it to your Wireguard app and click connect. If you are on Linux the process is identical with the server, just put the file in /etc/wireguard/wg0.conf and wg-quick up wg0
To check the status type
sudo wg show
and make sure you are receiving packets.
If you want to automatically start Wireguard on startup type
sudo systemctl enable wg-quick@wg0.service
Finally let’s make sure that your server is actually being used for DNS resolution.
pihole tail
will show you the DNS queries as they come. With that running, open up a browser window on your home computer and try to visit a website. The website’s name should pop up in the output of tail.
Remember the dashboard password we wrote down in the begining? With the Wireguard connection running, visiting http://192.168.5.1/admin/ (or whatever IP you used) will bring up the pihole dashboard where you can login as admin with that password.
This was a pretty basic networking setup but you can do much more complex ones for your use case. If you want to follow updates on wireguard’s development you can subsribe to the mailing list
Written on April 22nd , 2019 by Drexl Spivey